Drupal 8/9 Image Effects
Problem / Motivation:
The problem I wanted to solve was - to apply image styles (especially with the Image Effects module), on images, but dynamically & on-demand, and not use dozens of pre-configured Image Styles.
Why would anyone want something like this? I can give you a couple of examples:
- Facebook / Twitter Preview image, for every post. Let’s say you want Drupal to generate an image, by using Post Cover, Post Date, Title and potentially slap on some tags - and compile a Facebook compatible final image.
- Gift Card Generator 🎴 - where users have a set of pre-configured options they may choose, colors, fonts, texts and use some pre-defined layouts to put everything together.
- Dynamic Watermarks 🖼 - allow users to upload their own watermarks and apply those on top of their images - without creating a custom Image Style per user.
- Banners - allow users to choose predefined layouts and craft their own banners.
- Automate SMM - if you have some content that once created should automatically post a Social Media article with an image - you can use this approach as well.
- Customization of Avatars 🗿 - similar way Facebook does - you can stitch them with text, images, canvases, etc.
- NFTs! Yeah, you could define traits and use Drupal to assemble vast collections, by programmatically overlaying the traits.
- Many other ideas, that I’m not currently aware of 😀
There are many ways one might want to achieve these:
- [low level] - Use PHP’s GD or ImageMagick library - here’s the full reference.
- [mid level] - use an implementation of GDImageToolkitOperationBase (which extends ImageToolkitOperation). The implementations of this class define an execute method that handles the transformation.
- [high level] - use an implementation of ConfigurableImageEffectBase (which extends ImageEffectBase). The implementations of these plugins have an applyEffect method.
Me being lazy, I didn’t want to use neither low level nor mid-level implementations. I wanted to use something that an Image Style would use - higher level. I know some devs like to have more control and would pick a lower level approach, but that’s not me (one of the reasons why I use Drupal in 1st place).
The fun part is that “high level”, I mean, using ConfigurableImageEffectBase - means using plugins - now let’s do a quick recap on Plugins and Plugin Managers.
About Plugins & Plugin Managers:
I’m definitely not the best person to explain what Plugins and Plugin Managers in Drupal are - but here’s an excellent explainer and video 🎥 from Joe Shindelar, on Drupalize.me.
Here’s also a full write-up on api.drupal.org & official docs.
“Plugins are small pieces of functionality that are swappable. Plugins that perform similar functionality are of the same plugin type.”
Drupal uses Plugins & Plugin Managers to create little reusable bits of code, think: Blocks, Entities, Search, etc - and yes, Image Effects (that are used in the Image Styles).
Image Effects - are plugins too:
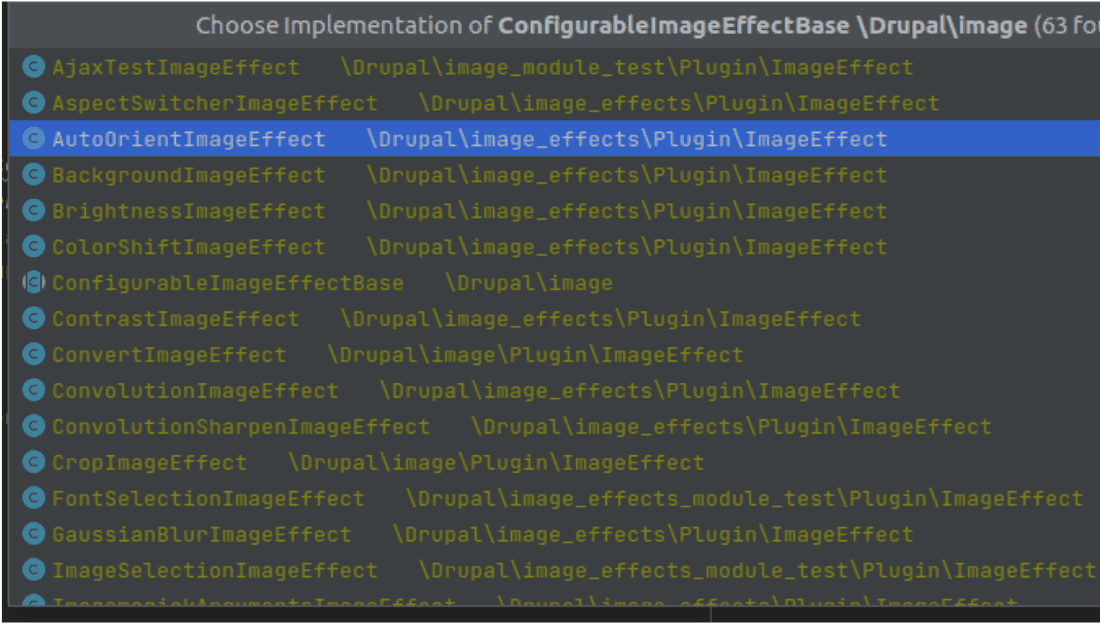
Yep, Image Effects are plugins tpp, and they have a Plugin Manager as well, that manages them. Here’s an example of all the classes that implement ConfigurableImageEffectBase.

We can use all of these. But you can’t just make a new instance of the class and work with it - you have to use a Plugin Manager as a proxy for that. Assuming you’re using a dependency injection (in a service, controller or a custom form):
Once you have your plugin manager (instance of ImageEffectManager), you can request your plugins this way, and apply the effects on a given image:
Using Image Effects & Textimage, programmatically & dynamically:
Now, let’s see this in practice - let’s apply some Image Effects & Textimage effects. Let’s install and enable Image Effects first.
Then, we can use something like this:
This will create a rectangle image 800x600 with a given canvas color. All of these are values so we can set these dynamically.
Now let’s play with text overlays - we need to install and enable the Textimage module. The $data variable for these effects are a bit bigger.
You can surely make more changes and adopt these to your own needs 🙃 these are just some random examples.
Putting it all together: a tiny demo module:
Okay this definitely took some time - but I’ve finally finished working on a demo module. If you want to see this in action - just head to - https://github.com/Nikro/blog-drupal-demos
Make sure you have docksal (and hence - docker) installed, and then just clone and run: fin init

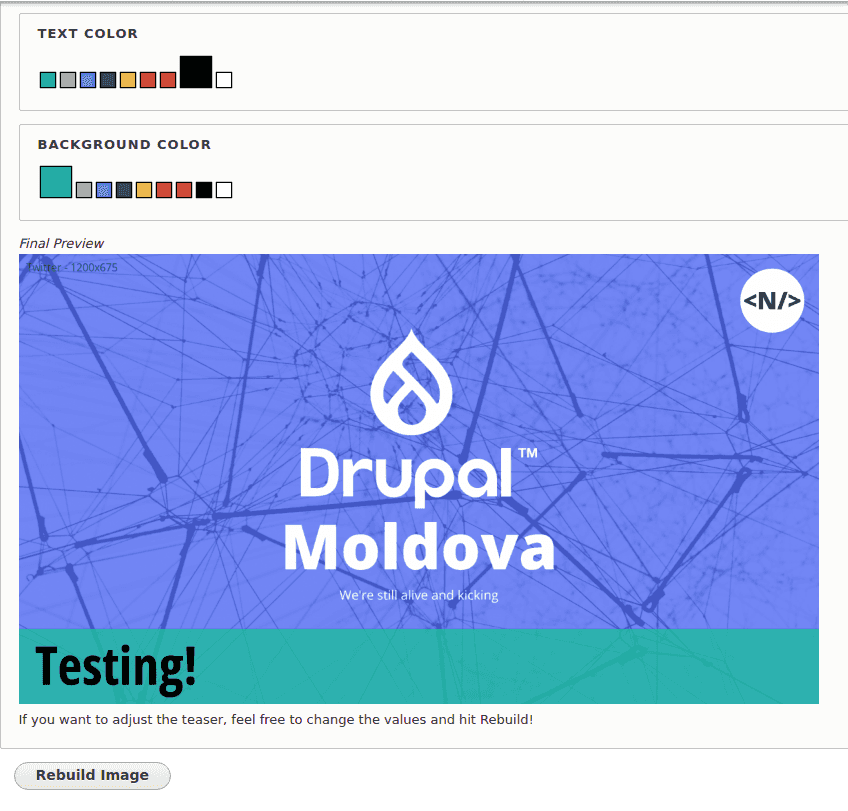
You will be able to navigate to: /admin/config/demo/nikro_image_effects/form-demo - to play with the image effects demo.
This is a small demo:
- It allows users to select a format that they want - this applies initial cropping, pre-defined image-style (derivative).
- It allows users to enter a Headline (which will be overlaid on the bottom of the image).
- It allows users to select a color for text and a color for the background of the text.
- It will overlay a Favicon from my website, to the top-right corner.
- Also, I used different fonts for different image formats (facebook vs twitter).
I hope this gives a general idea of how this can be used and for what. One can even use this to craft amazing NFT collections (imagine overlaying various traits) 😉
Note - this was a quick and dirty implementation, if you spot anything that can be improved, please let me know (or, make a fork and a pull-request).
💡 Inspired by this article?
If you found this article helpful and want to discuss your specific needs, I'd love to help! Whether you need personal guidance or are looking for professional services for your business, I'm here to assist.
Comments:
Feel free to ask any question / or share any suggestion!